
OpenAI gpt-ossファインチューニング解説
OpenAI GPT-OSSのファインチューニング完全ガイド:最新オープンウェイト推論モデルの活用術
目次
- GPT-OSSの概要と特徴
- 環境セットアップ
- ファインチューニングの基本概念
- データ準備とフォーマッティング
- LoRAを使用したファインチューニング
- 多言語推論の実装
- パフォーマンス最適化
- 実用的なTipsと推奨事項
GPT-OSSの概要と特徴
OpenAIが2025年1月にリリースしたGPT-OSSは、同社初のオープンウェイト推論モデルファミリーです。GPT-2以来5年ぶりのオープンソースリリースとなり、研究者や開発者にとって画期的なモデルとなっています。
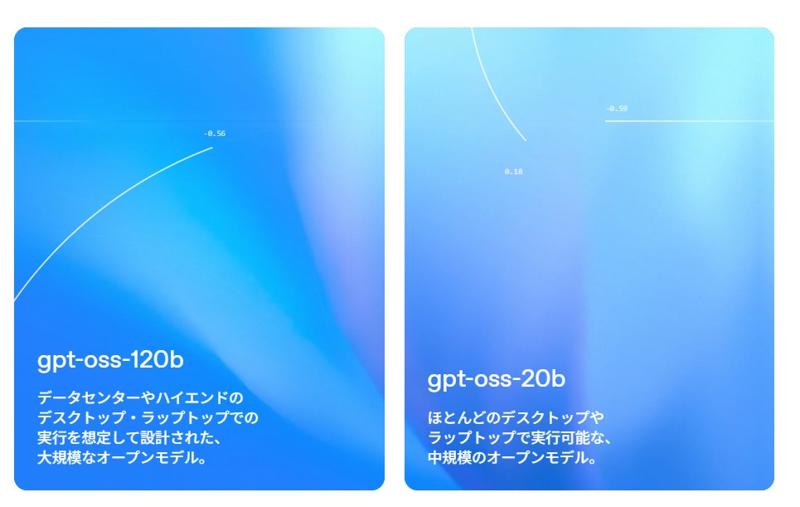
2つのモデルサイズ
GPT-OSSは2つのバリエーションで提供されています:
- gpt-oss-120b: 総パラメータ数117億、アクティブパラメータ数51億
- gpt-oss-20b: 総パラメータ数21億、アクティブパラメータ数36億
どちらのモデルもMixture of Experts(MoE)アーキテクチャを採用しており、推論時に必要なアクティブパラメータを削減することで効率的な動作を実現しています。
主要な技術的特徴
アーキテクチャの詳細
# モデルの主要仕様
{
    "architecture": "MoE Transformer",
    "quantization": "MXFP4",
    "context_length": 128000,
    "attention_pattern": "Alternating dense and sparse",
    "positional_encoding": "RoPE",
    "activation": "SwiGLU"
}
推論機能
GPT-OSSの最大の特徴は、Chain-of-Thought(CoT)推論機能です:
- 3段階の推論レベル: low、medium、high
- 透明な思考プロセス: 推論過程が可視化される
- ツール使用機能: Web検索やPythonコード実行が可能
環境セットアップ
基本的な依存関係のインストール
# PyTorchのインストール(CUDA 12.8対応)
pip install torch --index-url https://download.pytorch.org/whl/cu128

# 必要なライブラリのインストール
pip install "trl>=0.20.0" "peft>=0.17.0" "transformers>=4.55.0"
pip install accelerate datasets trackio

# MXFP4サポート用(H100/H200/RTX 50xx系の場合)
pip install torch==2.8.0 --index-url https://download.pytorch.org/whl/test/cu128
pip install git+https://github.com/triton-lang/triton.git@main#subdirectory=python/triton_kernels
Hugging Face認証
from huggingface_hub import notebook_login
notebook_login()
システム要件確認
import torch
import transformers
print(f"PyTorch version: {torch.__version__}")
print(f"CUDA available: {torch.cuda.is_available()}")
print(f"GPU memory: {torch.cuda.get_device_properties(0).total_memory / 1e9:.1f} GB")
ファインチューニングの基本概念
GPT-OSSの特殊なメッセージフォーマット
GPT-OSSは独自の「Harmony」フォーマットを使用しています:
# 標準的な会話例
messages = [
    {"role": "developer", "content": "あなたは親切なAIアシスタントです。"},
    {"role": "user", "content": "フランスの首都は何ですか?"},
    {
        "role": "assistant",
        "thinking": "ユーザーはフランスの首都について質問している。これは簡単な地理の問題だ。フランスの首都はパリです。",
        "content": "フランスの首都はパリです。"
    }
]
チャネルシステムの理解
# GPT-OSSの出力構造
output_structure = {
    "analysis": "内部思考プロセス(CoT)",
    "final": "ユーザーに表示される最終回答"
}
データ準備とフォーマッティング
データセットの準備
多言語推論データセットの例を見てみましょう:
from datasets import load_dataset, Dataset

# サンプルデータセットの作成
def create_multilingual_reasoning_data():
    data = []

    # 日本語での推論例
    japanese_example = {
        "messages": [
            {"role": "developer", "content": "推論言語: 日本語"},
            {"role": "user", "content": "ストロベリーという単語にはrが何個含まれていますか?"},
            {
                "role": "assistant",
                "thinking": "ユーザーは「strawberry」という単語のrの数を聞いている。文字を一つずつ確認してみよう。s-t-r-a-w-b-e-r-r-y。rは3番目、8番目、9番目にある。つまり3個のrが含まれている。",
                "content": "「strawberry」という単語には、**3個**のrが含まれています。"
            }
        ]
    }

    # フランス語での推論例
    french_example = {
        "messages": [
            {"role": "developer", "content": "langue de raisonnement: français"},
            {"role": "user", "content": "Quelle est la capitale de l'Australie?"},
            {
                "role": "assistant",
                "thinking": "L'utilisateur demande la capitale de l'Australie. Je sais que c'est Canberra, pas Sydney comme beaucoup de gens le pensent. Sydney est la plus grande ville, mais la capitale est bien Canberra.",
                "content": "La capitale de l'Australie est **Canberra**, et non Sydney comme on pourrait le penser."
            }
        ]
    }

    data.extend([japanese_example, french_example])
    return Dataset.from_list(data)

# データセットの作成
train_dataset = create_multilingual_reasoning_data()
print(f"Dataset size: {len(train_dataset)}")
チャットテンプレートの適用
from transformers import AutoTokenizer

def format_dataset(dataset, tokenizer):
    """データセットをトレーニング用にフォーマット"""

    def apply_template(examples):
        formatted_chats = []
        for messages in examples["messages"]:
            # チャットテンプレートを適用
            formatted_chat = tokenizer.apply_chat_template(
                messages,
                tokenize=False,
                add_generation_prompt=False
            )
            formatted_chats.append(formatted_chat)

        return {"formatted_chat": formatted_chats}

    return dataset.map(apply_template, batched=True)

# 使用例
tokenizer = AutoTokenizer.from_pretrained("openai/gpt-oss-20b")
formatted_dataset = format_dataset(train_dataset, tokenizer)
LoRAを使用したファインチューニング
モデルの準備
import torch
from transformers import AutoModelForCausalLM, Mxfp4Config
from peft import LoraConfig, get_peft_model

def load_model_for_training():
    """ファインチューニング用にモデルを読み込み"""

    # 量子化設定
    quantization_config = Mxfp4Config(dequantize=True)

    # モデル設定
    model_kwargs = {
        "attn_implementation": "eager",
        "torch_dtype": torch.bfloat16,
        "quantization_config": quantization_config,
        "use_cache": False,  # トレーニング時はFalse
        "device_map": "auto",
    }

    # モデル読み込み
    model = AutoModelForCausalLM.from_pretrained(
        "openai/gpt-oss-20b",
        **model_kwargs
    )

    return model

model = load_model_for_training()
LoRA設定の最適化
def setup_lora_config():
    """MoEモデル用のLoRA設定"""

    peft_config = LoraConfig(
        r=8,  # ランク(大きいほど表現力が高いが、メモリ使用量も増加)
        lora_alpha=16,
        target_modules="all-linear",  # 全線形層を対象
        target_parameters=[
            # MoEの専門家層も対象に含める
            "7.mlp.experts.gate_up_proj",
            "7.mlp.experts.down_proj",
            "15.mlp.experts.gate_up_proj",
            "15.mlp.experts.down_proj",
            "23.mlp.experts.gate_up_proj",
            "23.mlp.experts.down_proj",
        ],
        lora_dropout=0.1,
        bias="none",
        task_type="CAUSAL_LM"
    )

    return peft_config

# LoRAの適用
peft_config = setup_lora_config()
peft_model = get_peft_model(model, peft_config)
peft_model.print_trainable_parameters()
トレーニング設定
from trl import SFTConfig, SFTTrainer

def create_training_config():
    """最適化されたトレーニング設定"""

    training_args = SFTConfig(
        # 基本設定
        learning_rate=2e-4,
        num_train_epochs=1,
        per_device_train_batch_size=4,
        gradient_accumulation_steps=4,
        max_length=2048,

        # 最適化設定
        gradient_checkpointing=True,
        warmup_ratio=0.03,
        lr_scheduler_type="cosine_with_min_lr",
        lr_scheduler_kwargs={"min_lr_rate": 0.1},

        # ログ設定
        logging_steps=10,
        save_steps=100,
        evaluation_strategy="steps",
        eval_steps=100,

        # 出力設定
        output_dir="./gpt-oss-multilingual-reasoner",
        push_to_hub=True,
        report_to="trackio",  # 実験追跡

        # メモリ最適化
        dataloader_pin_memory=False,
        remove_unused_columns=True,
    )

    return training_args

training_args = create_training_config()
トレーニングの実行
def train_model(model, tokenizer, dataset, training_args):
    """モデルのトレーニングを実行"""

    trainer = SFTTrainer(
        model=model,
        args=training_args,
        train_dataset=dataset,
        processing_class=tokenizer,
        max_seq_length=training_args.max_length,
    )

    # トレーニング開始
    print("Starting training...")
    trainer.train()

    # モデルの保存
    trainer.save_model()

    # Hub にプッシュ
    if training_args.push_to_hub:
        trainer.push_to_hub(
            commit_message="Fine-tuned GPT-OSS for multilingual reasoning"
        )

    return trainer

# トレーニング実行
trainer = train_model(peft_model, tokenizer, formatted_dataset, training_args)
多言語推論の実装
推論用モデルの準備
def load_fine_tuned_model(model_path):
    """ファインチューニング済みモデルの読み込み"""

    from peft import PeftModel

    # ベースモデルの読み込み
    model_kwargs = {
        "attn_implementation": "eager",
        "torch_dtype": "auto",
        "use_cache": True,  # 推論時はTrue
        "device_map": "auto"
    }

    base_model = AutoModelForCausalLM.from_pretrained(
        "openai/gpt-oss-20b",
        **model_kwargs
    )

    # PEFTウェイトのマージ
    peft_model = PeftModel.from_pretrained(base_model, model_path)
    model = peft_model.merge_and_unload()

    return model

# ファインチューニング済みモデルの読み込み
fine_tuned_model = load_fine_tuned_model("./gpt-oss-multilingual-reasoner")
多言語推論の実装
def multilingual_reasoning(model, tokenizer, user_input, reasoning_language="Japanese"):
    """多言語での推論を実行"""

    # システムプロンプトで推論言語を指定
    system_prompt = f"推論言語: {reasoning_language}"

    messages = [
        {"role": "system", "content": system_prompt},
        {"role": "user", "content": user_input}
    ]

    # 入力をトークン化
    input_ids = tokenizer.apply_chat_template(
        messages,
        add_generation_prompt=True,
        return_tensors="pt"
    ).to(model.device)

    # 生成設定
    gen_kwargs = {
        "max_new_tokens": 1024,
        "do_sample": True,
        "temperature": 0.7,
        "top_p": 0.9,
        "pad_token_id": tokenizer.eos_token_id
    }

    # テキスト生成
    with torch.no_grad():
        output_ids = model.generate(input_ids, **gen_kwargs)

    # 結果のデコード
    response = tokenizer.decode(
        output_ids[0][input_ids.shape[-1]:],
        skip_special_tokens=False
    )

    return parse_response(response)

def parse_response(response):
    """レスポンスから思考プロセスと最終回答を分離"""

    # 分析チャネル(思考プロセス)の抽出
    analysis_start = response.find("<|channel|>analysis<|message|>")
    analysis_end = response.find("<|end|><|start|>assistant<|channel|>final<|message|>")

    thinking = ""
    if analysis_start != -1 and analysis_end != -1:
        thinking = response[analysis_start + 28:analysis_end].strip()

    # 最終回答の抽出
    final_start = response.find("<|channel|>final<|message|>")
    final_answer = ""
    if final_start != -1:
        final_answer = response[final_start + 27:].strip()
        # 特殊トークンを除去
        final_answer = final_answer.replace("<|end|>", "").strip()

    return {
        "thinking": thinking,
        "answer": final_answer,
        "raw_response": response
    }
使用例
# 日本語での推論
japanese_result = multilingual_reasoning(
    fine_tuned_model,
    tokenizer,
    "ストロベリーという単語にはrが何個含まれていますか?",
    reasoning_language="Japanese"
)

print("思考プロセス:", japanese_result["thinking"])
print("最終回答:", japanese_result["answer"])

# フランス語での推論
french_result = multilingual_reasoning(
    fine_tuned_model,
    tokenizer,
    "Combien de lettres 'r' y a-t-il dans le mot 'strawberry'?",
    reasoning_language="French"
)

print("Processus de réflexion:", french_result["thinking"])
print("Réponse finale:", french_result["answer"])
パフォーマンス最適化
GPU別最適化設定
def get_optimized_config(gpu_type="H100"):
    """GPU別の最適化設定"""

    configs = {
        "H100": {
            "use_mxfp4": True,
            "use_flash_attention_3": True,
            "batch_size": 8,
            "gradient_accumulation_steps": 2,
        },
        "RTX_4090": {
            "use_mxfp4": False,
            "use_megablocks": True,
            "batch_size": 4,
            "gradient_accumulation_steps": 4,
        },
        "A100": {
            "use_mxfp4": False,
            "use_megablocks": True,
            "batch_size": 6,
            "gradient_accumulation_steps": 3,
        }
    }

    return configs.get(gpu_type, configs["RTX_4090"])

# 設定の適用
config = get_optimized_config("H100")
Flash Attention 3の使用
def load_optimized_model():
    """Flash Attention 3を使用した最適化モデル"""

    model = AutoModelForCausalLM.from_pretrained(
        "openai/gpt-oss-20b",
        device_map="auto",
        torch_dtype="auto",
        # Flash Attention 3を使用
        attn_implementation="kernels-community/vllm-flash-attn3",
        # MXFP4量子化
        quantization_config=Mxfp4Config(dequantize=True)
    )

    return model
メモリ使用量の監視
def monitor_memory_usage():
    """GPU メモリ使用量の監視"""

    if torch.cuda.is_available():
        allocated = torch.cuda.memory_allocated() / 1e9
        reserved = torch.cuda.memory_reserved() / 1e9

        print(f"GPU Memory - Allocated: {allocated:.2f} GB, Reserved: {reserved:.2f} GB")

    return allocated, reserved

# トレーニング中の監視例
class MemoryCallback:
    def on_step_end(self, args, state, control, logs=None, **kwargs):
        if state.global_step % 10 == 0:
            monitor_memory_usage()
実用的なTipsと推奨事項
1. データ品質の向上
def validate_training_data(dataset):
    """トレーニングデータの品質チェック"""

    issues = []

    for idx, example in enumerate(dataset):
        messages = example["messages"]

        # Assistant メッセージの thinking フィールドをチェック
        for msg in messages:
            if msg["role"] == "assistant":
                if "thinking" not in msg:
                    issues.append(f"Example {idx}: Missing thinking field")
                elif len(msg["thinking"]) < 10:
                    issues.append(f"Example {idx}: Thinking too short")

    return issues

# データ検証の実行
validation_issues = validate_training_data(train_dataset)
if validation_issues:
    print("Data validation issues found:")
    for issue in validation_issues[:5]:  # 最初の5件のみ表示
        print(f"  - {issue}")
2. ハイパーパラメータの調整
def find_optimal_batch_size(model, tokenizer, sample_data):
    """最適なバッチサイズの自動調整"""

    batch_sizes = [1, 2, 4, 8, 16]
    optimal_batch_size = 1

    for batch_size in batch_sizes:
        try:
            # テスト用のダミーデータ
            inputs = tokenizer(
                [sample_data] * batch_size,
                return_tensors="pt",
                padding=True,
                truncation=True,
                max_length=512
            ).to(model.device)

            # フォワードパス
            with torch.no_grad():
                outputs = model(**inputs)

            # メモリクリア
            torch.cuda.empty_cache()
            optimal_batch_size = batch_size

        except torch.cuda.OutOfMemoryError:
            print(f"OOM at batch size {batch_size}")
            break

    return optimal_batch_size

# 最適バッチサイズの決定
optimal_bs = find_optimal_batch_size(model, tokenizer, "テストメッセージ")
print(f"Optimal batch size: {optimal_bs}")
3. 継続的な評価
def evaluate_reasoning_quality(model, tokenizer, test_cases):
    """推論品質の評価"""

    results = []

    for test_case in test_cases:
        result = multilingual_reasoning(
            model, tokenizer,
            test_case["input"],
            test_case["reasoning_language"]
        )

        # 評価メトリクス
        evaluation = {
            "input": test_case["input"],
            "expected": test_case["expected"],
            "actual": result["answer"],
            "thinking_length": len(result["thinking"]),
            "has_reasoning": len(result["thinking"]) > 50,
        }

        results.append(evaluation)

    return results

# 評価データの準備
test_cases = [
    {
        "input": "2 + 2 × 3 = ?",
        "reasoning_language": "Japanese",
        "expected": "8"
    }
]

evaluation_results = evaluate_reasoning_quality(fine_tuned_model, tokenizer, test_cases)
4. プロダクション環境での最適化
class OptimizedInference:
    def __init__(self, model_path):
        self.model = self.load_optimized_model(model_path)
        self.tokenizer = AutoTokenizer.from_pretrained("openai/gpt-oss-20b")

        # KV-cache の事前割り当て
        self.setup_kv_cache()

    def load_optimized_model(self, model_path):
        """プロダクション用最適化モデル"""
        return AutoModelForCausalLM.from_pretrained(
            model_path,
            device_map="auto",
            torch_dtype=torch.bfloat16,
            use_cache=True,
            attn_implementation="kernels-community/vllm-flash-attn3",
        )

    def setup_kv_cache(self):
        """KV-cacheの設定"""
        # 事前にウォームアップを実行
        dummy_input = self.tokenizer(
            "ウォームアップ用テキスト",
            return_tensors="pt"
        ).to(self.model.device)

        with torch.no_grad():
            self.model(**dummy_input)

    def batch_inference(self, inputs, reasoning_language="Japanese"):
        """バッチ推論の実装"""
        results = []

        for input_text in inputs:
            result = multilingual_reasoning(
                self.model, self.tokenizer,
                input_text, reasoning_language
            )
            results.append(result)

        return results

# 使用例
inference_engine = OptimizedInference("./gpt-oss-multilingual-reasoner")
batch_results = inference_engine.batch_inference([
    "フランスの首都は?",
    "Pythonでリストをソートする方法は?"
])
5. エラーハンドリングとロバストネス
def robust_inference(model, tokenizer, user_input, max_retries=3):
    """エラー耐性のある推論実装"""

    for attempt in range(max_retries):
        try:
            result = multilingual_reasoning(model, tokenizer, user_input)

            # 結果の妥当性チェック
            if result["answer"] and len(result["answer"]) > 5:
                return result
            else:
                print(f"Attempt {attempt + 1}: Invalid response, retrying...")

        except Exception as e:
            print(f"Attempt {attempt + 1} failed: {e}")

            if attempt == max_retries - 1:
                return {"error": str(e), "thinking": "", "answer": ""}

            # メモリクリア
            torch.cuda.empty_cache()

    return {"error": "Max retries exceeded", "thinking": "", "answer": ""}
まとめ
GPT-OSSのファインチューニングは、従来のLLMとは異なる独特の特徴を持っています:
- MoEアーキテクチャ: 効率的な推論が可能だが、専門家層のファインチューニングが重要
- 推論機能: Chain-of-Thought機能を活用した高品質な応答生成
- 多言語対応: 言語指定による推論言語の制御が可能
- ハードウェア最適化: MXFP4量子化とFlash Attention 3による高速化
これらの特徴を理解し、適切にファインチューニングを行うことで、研究から商用アプリケーションまで幅広い用途でGPT-OSSを活用できます。オープンソースという特性を活かし、コミュニティ全体でモデルの改善と応用を進めていきましょう。